How-To: Replacing Memjet Ink Revolver Gaskets Leave a comment
How to Replace a Memjet Revolver Gasket (Step-by-Step)
If your Memjet-powered printer is leaking, dropping out a color, or showing inconsistent priming, a worn revolver gasket can be the culprit. Below is a clean, field-tested process to replace that gasket without damaging the print system.
Tools & Supplies
-
Replacement revolver gasket (OEM-specified)
-
Small Phillips screwdriver
-
Small flat screwdriver or pick (for the C-clip)
-
Clean, lint-free cloths
-
Orange printhead storage cap (to prevent dehydration)
Estimated time: 10–15 minutes
Before You Begin
-
De-prime the system by ejecting the printhead.
-
Remove the printhead and immediately store it in the orange cap and foil bag to avoid dehydration.
-
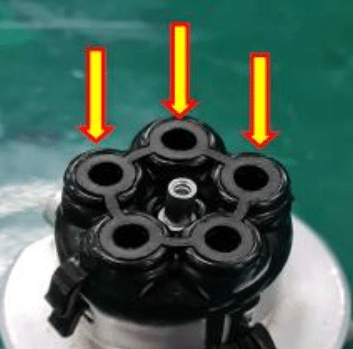
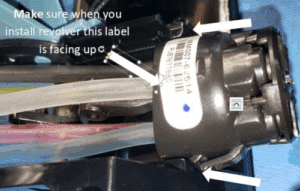
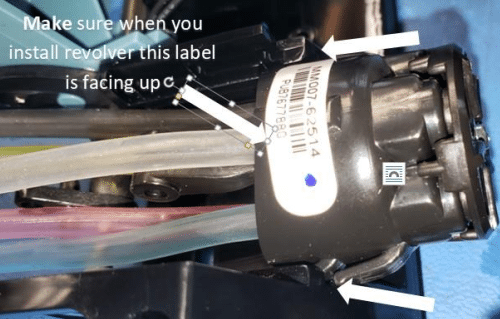
Revolver orientation: keep the label on the revolver facing up throughout the procedure.
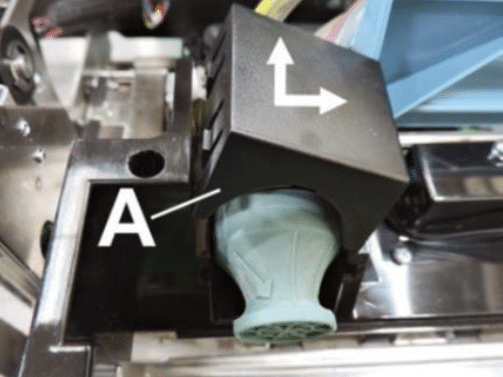
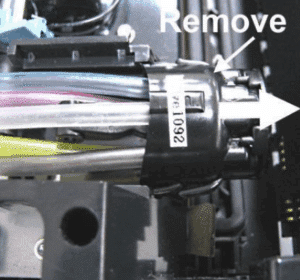
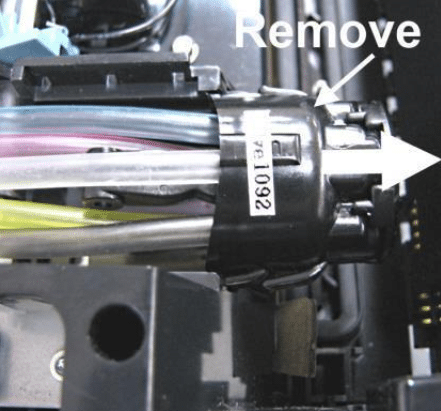
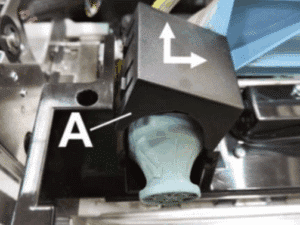
1) Remove the Revolver Cover (Image A)
-
Open the printer to access the ink revolver area.
-
Push the cover toward the center of the printer to release pressure on the tabs.
-
Lift the cover to release the tabs and remove it. Set the cover aside.
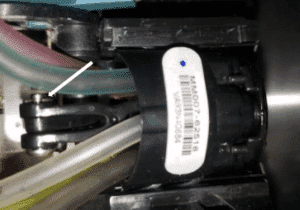
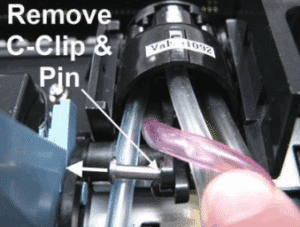
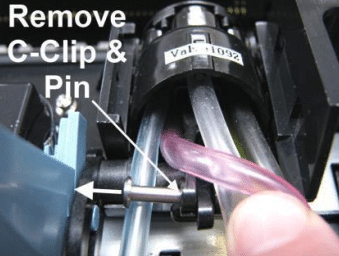
2) Detach and Remove the Ink Revolver
-
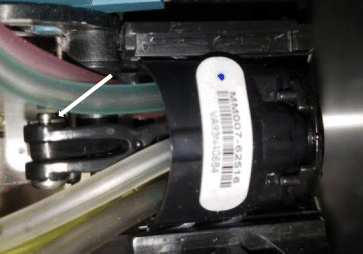
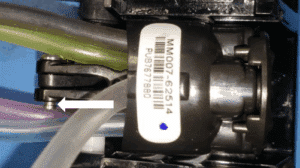
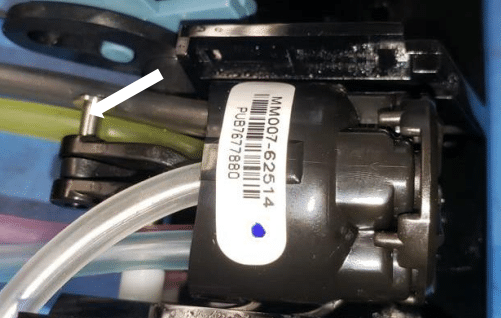
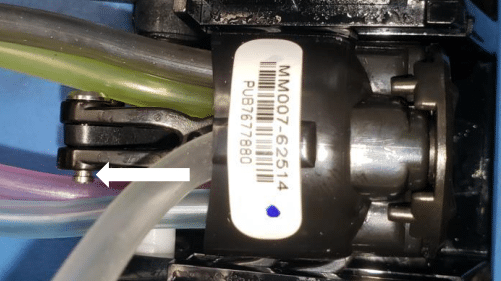
Locate the hinge pin that secures the revolver and the small C-clip on that pin.

-
Carefully remove the C-clip, then pull out the hinge pin.

-
Slide the ink revolver forward along its track and lift it out of the printer.

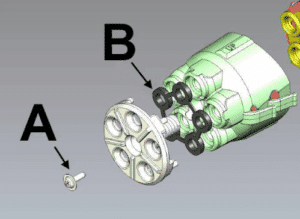
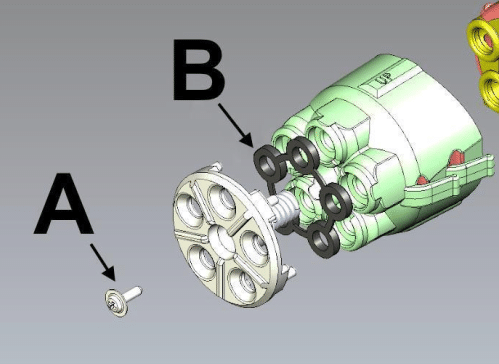
3) Replace the Revolver Gasket
-
On the revolver head assembly, remove the single screw [A] securing the revolver cap.

-
Lift off the cap—be careful, there’s a spring underneath. Keep the spring in place.
-
Remove the old gasket [B].
-
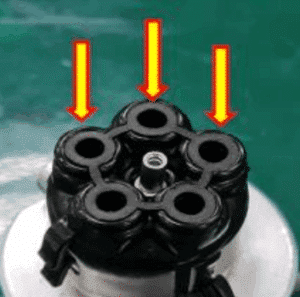
Install the new gasket. Ensure it sits flat and does not shift or block the revolver openings when you reinstall the cap.

-
Re-fit the cap (confirm the spring is correctly seated) and tighten the screw. Do not overtighten.
Pro tip: A tiny dab of distilled water on a lint-free swab can help lift a stubborn gasket without nicking the sealing surface. Wipe any residue before installing the new part.
4) Reinstall the Revolver
-
Align the revolver in the guide grooves and slide it all the way back into position.

-
Insert the hinge pin.


-
Reinstall the C-clip to lock the pin.

-
Reinstall the revolver cover by setting it in place and pressing until the tabs click.

5) Wrap-Up & Checks
-
Reinstall the printhead.
-
Prime/charge the system
-
Run a nozzle check or test print and inspect for leaks around the revolver.
Common Mistakes to Avoid
-
Forgetting the spring: The cap must go back with the spring in place or you’ll lose seal pressure.
-
Misaligned gasket: If the gasket shifts and partially blocks an opening, you may see priming failures or color dropouts.
-
Cover orientation: Keep the revolver label facing up to match the service instructions.
Replacing the revolver gasket is straightforward when you follow the sequence above. With the printhead protected, the spring accounted for, and the gasket fully seated, you’ll restore a reliable seal and get back to crisp, consistent prints.