How To Print Full-Bleed Artwork 1
When it comes to printing, there are specific ways you might want your labels to look so you can have a consistent and recognizable print on every product or promotional material. One of the most important aspects of label printing is to decide whether you want a label with full bleed or no bleed. So, what does full-bleed mean in printing? If your image or label has designated margins that stop the printing at a certain point, then you will have a no-bleed image. Those labels that extend the color or design all the way to the edges of the paper, with no visible white border, are considered full-bleed. Learn more about full-bleed printing from the experts at Chicago Color Label today!
What is Full-Bleed Printing?
Full bleed label printing is a printing technique where the ink for your artwork extends all the way to the edge of the label. With full bleed label designs, there is no visible white border. Instead, the artwork or images on the label covers the entire surface, creating a professional and visually appealing look.
In industrial, large-scale printing there are some rules that must be followed in order to get the correct result from your labels. Your design software will typically designate where the added margin for the bleed should be. This is part of the process known as prepress. The artwork is then sent to a printer and during the printing process, the label is printed with the design extending into these bleed areas. After printing is completed, the label is then trimmed down to its final size, ensuring that the design reaches all the way to the edges.
When printing your own labels, you will usually start with a label that is already cut to the specific size and shape needed. For this reason, you’ll need to be sure your artwork extends beyond the cut lines of your label by a small amount.
Why Use Full-Bleed Printing?
While some artwork calls for the use of no-bleed printing for their marketing and advertising needs, many opt for full-bleed printing simply because on more tactile materials or projects it eliminates any white borders or uneven edges that can impact the overall layout and view of the image. Many popular design tools such as InDesign, Illustrator, and Photoshop offer full-bleed modes and templates that adhere to the common industry-standard trim line of 0.125” to help you get started. Those settings follow industry standards for large scale press production of your artwork. Our process is a bit simpler when printing on one of our digital inkjet printers.
How To Print Full-Bleed Labels?
Here are step-by-step instructions for full-bleed printing as highlighted by the included video below:
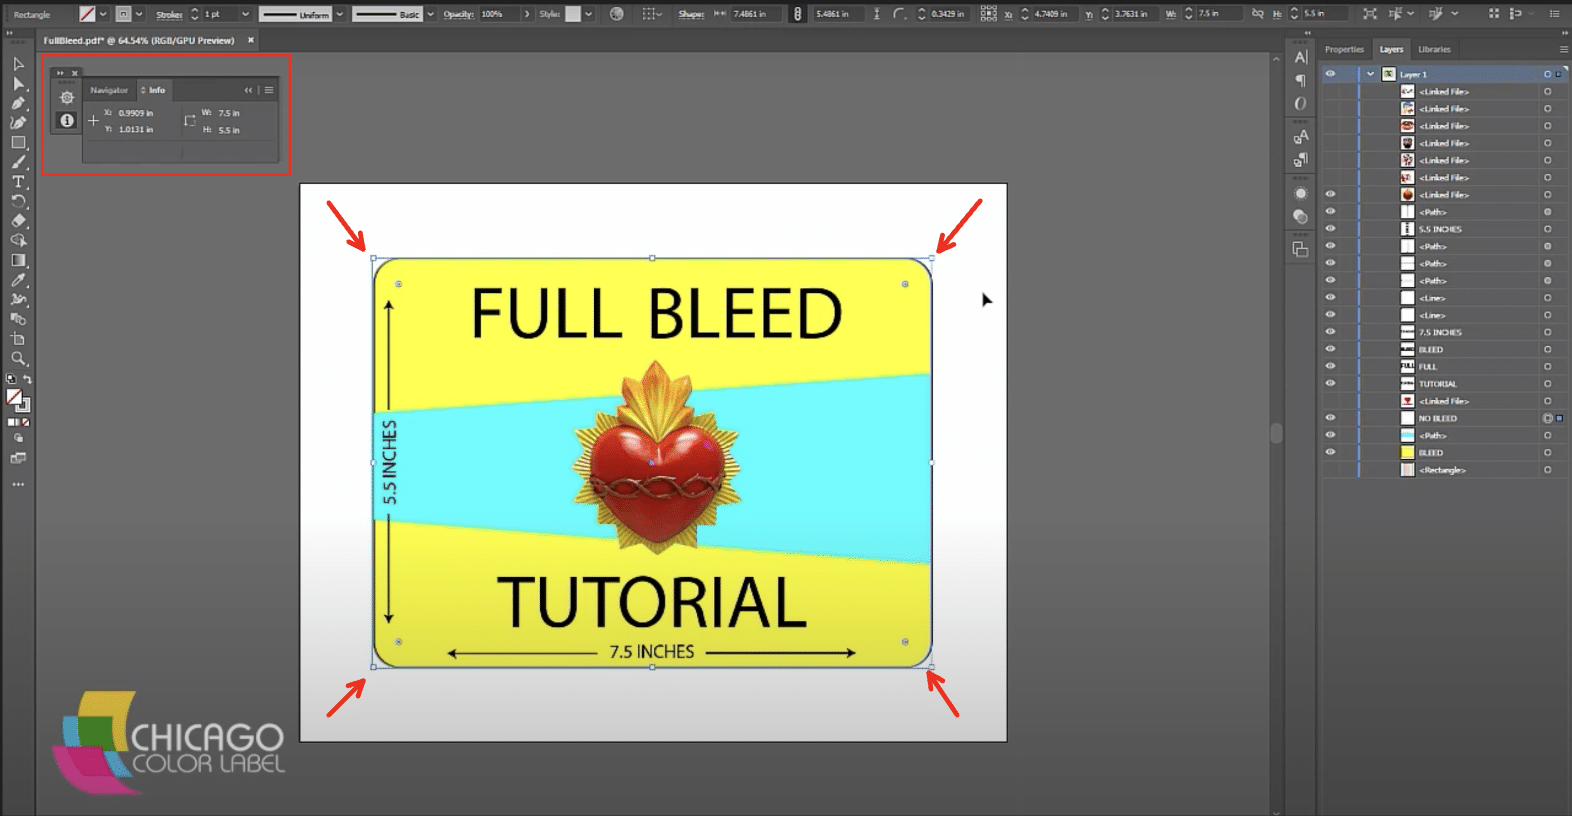
1: Remove unnecessary elements from your artwork

2: Make the artboard the exact same size as the artwork
3: Expand the artboard by .03 – .05 inches on all sides
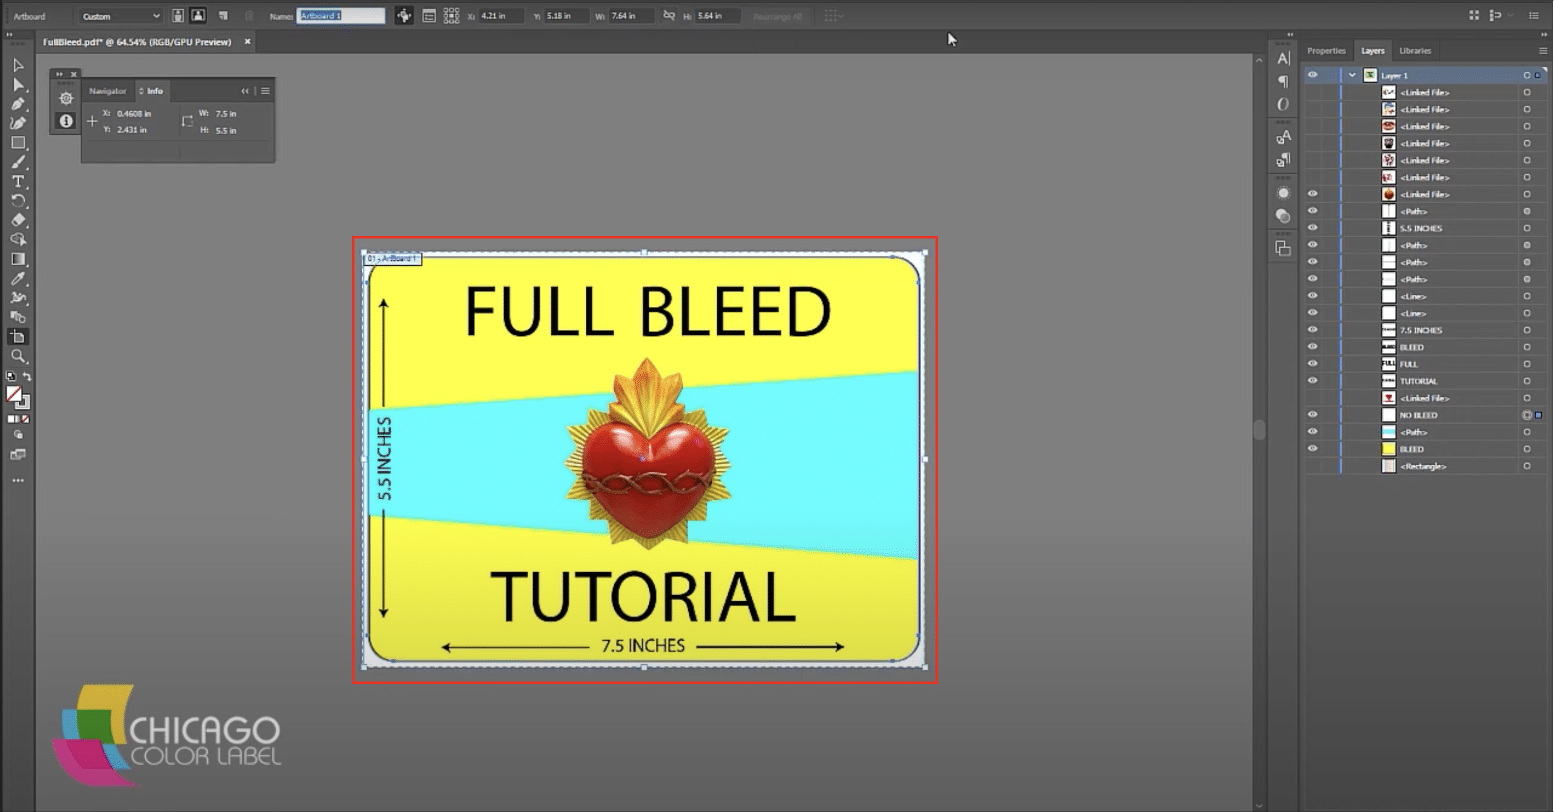
4: Create a new label size where the printed dimensions match the artboard dimensions

5: Setup your new label size
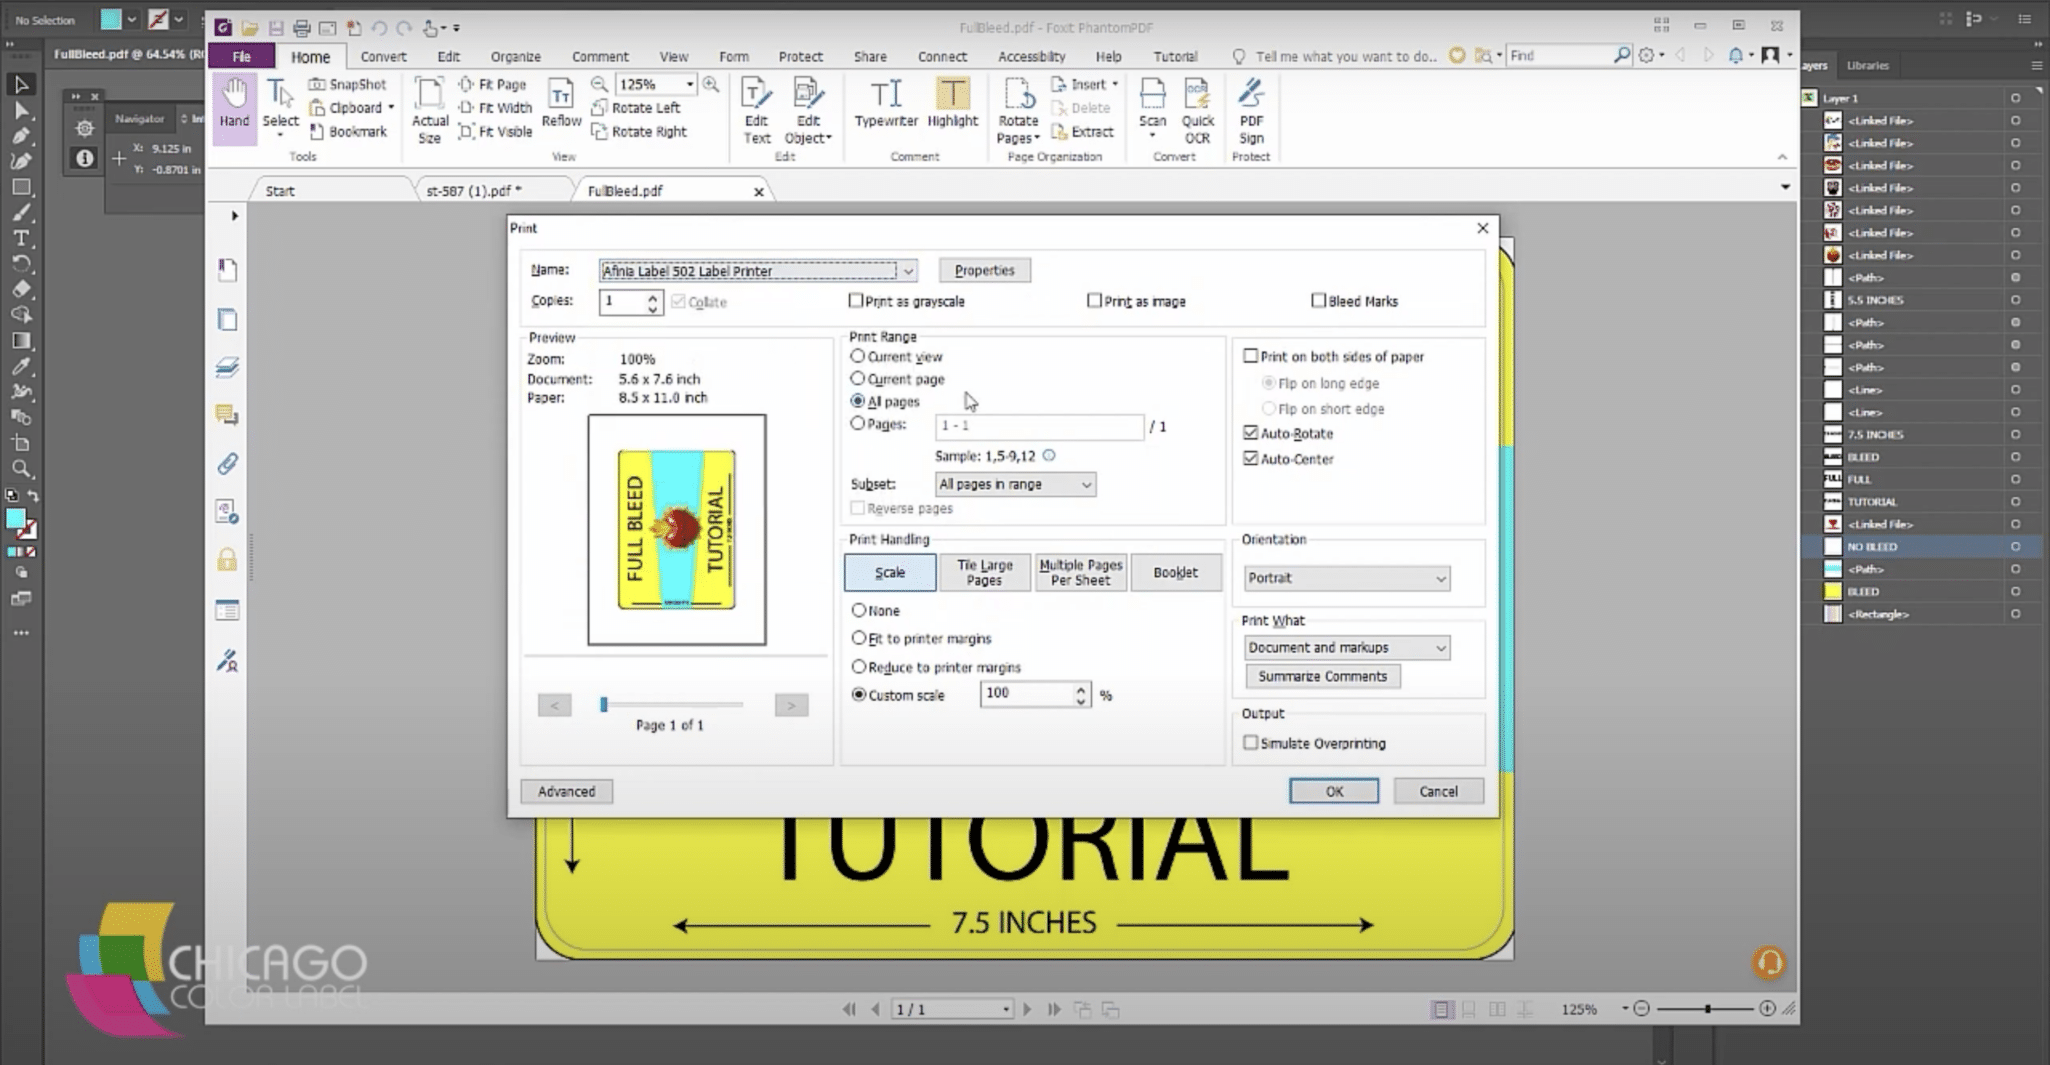
6: Test print and change offsets to fine-tune the position of the printed artwork
Learn More Printing Tips at Chicago Color Label
Once you’ve read more about how to print full-bleed art and labels, contact our Chicago Color Label team for more information on products and services to meet your business needs. You can find everything you need from label makers to commercial label printers and a wide variety of inks to make your business stand out. Be sure to request a free sample of colors to see which you like best!
Great insights on full bleed printing! The step-by-step guide makes it easier to understand the process and its importance in achieving high-quality results.